GE markets a series of lights called "Constant On". When they work,
they are reasonable lights. Unfortunately, of my twenty-odd strands, one was
dead right out of the box. Because the strand was purchased two years ago,
I couldn't return it to the store from which I purchased it. GE gives a two
year warranty on their Christmas lights. The only problem is that the
lights cost less than a third the one-way shipping cost even by ground, making
it completely unreasonable to return the set to them for repair.
In short, I was stuck with a set in which only half the bulbs lit, and
there was little I could do besides fix it myself (or use the set as
replacement bulbs for life).
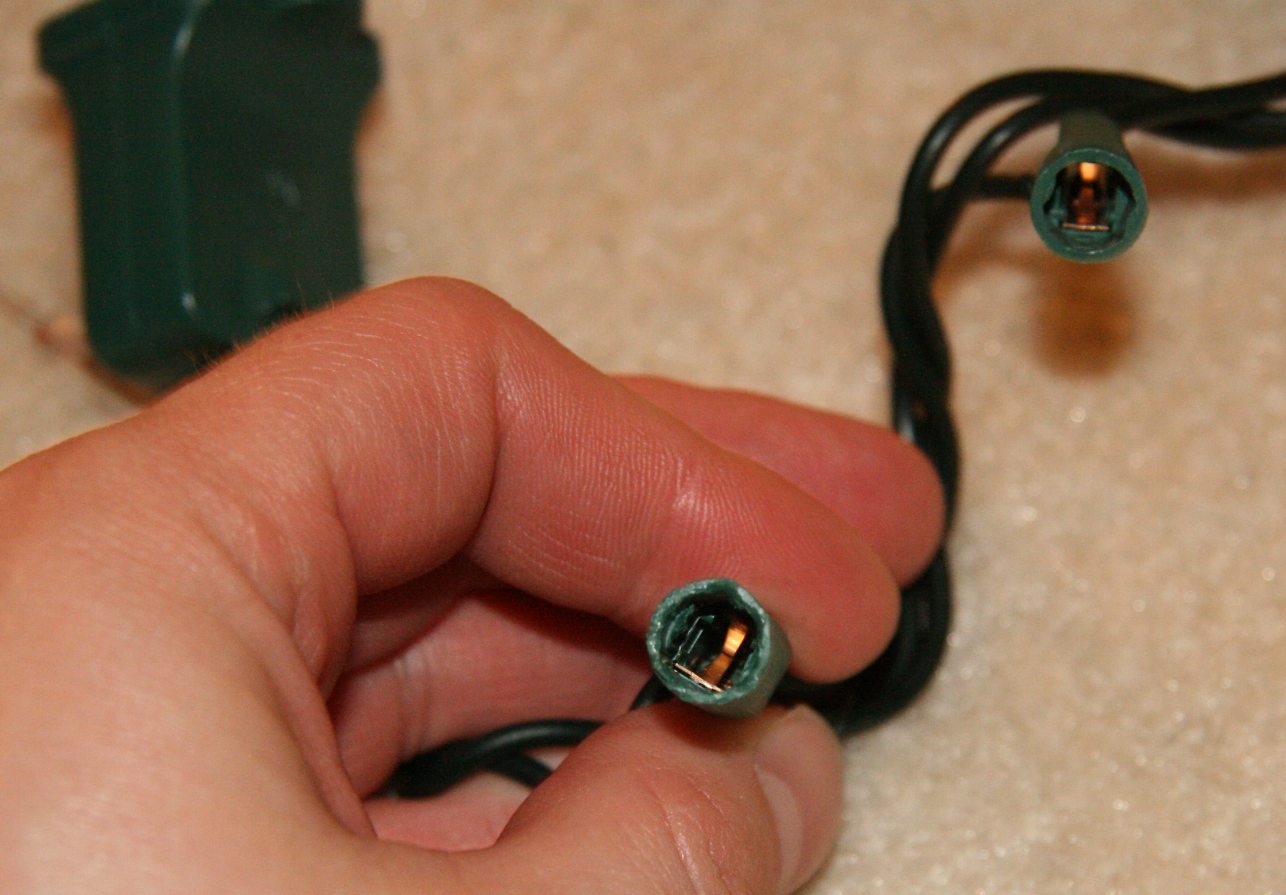
The basic design of these sets differs form other sets in that the socket
has two metal contacts that are spring loaded. If a bulb is removed, these
contacts spring together and complete the circuit. In theory. In practice,
the sockets are not quite designed right. Instead of having a period of time
where the bulb is in the socket but the socket is shorted around the bulb,
the socket contacts actually fail to close until well after the bulb's wires
are no longer making contact with the socket. As such, this is more a gimmick
than a usable feature, IMHO.
The fundamental problem with these sets---and this is a design problem---is
that they have a special bulb, which GE refers to as a "current limiting" bulb.
If this bulb fails, the entire set (or half the set) goes dead. This bulb is
not designed to be removable or serviceable (particularly bad for owners of
GE's pre-lit trees), and the warranty (useless as it is) is explicitly voided
if you remove this bulb. I therefore naturally immediately suspected this bulb
was at fault, as it struck me as the sort of part that is designed to fail
as a crude means of planned obsolescence....
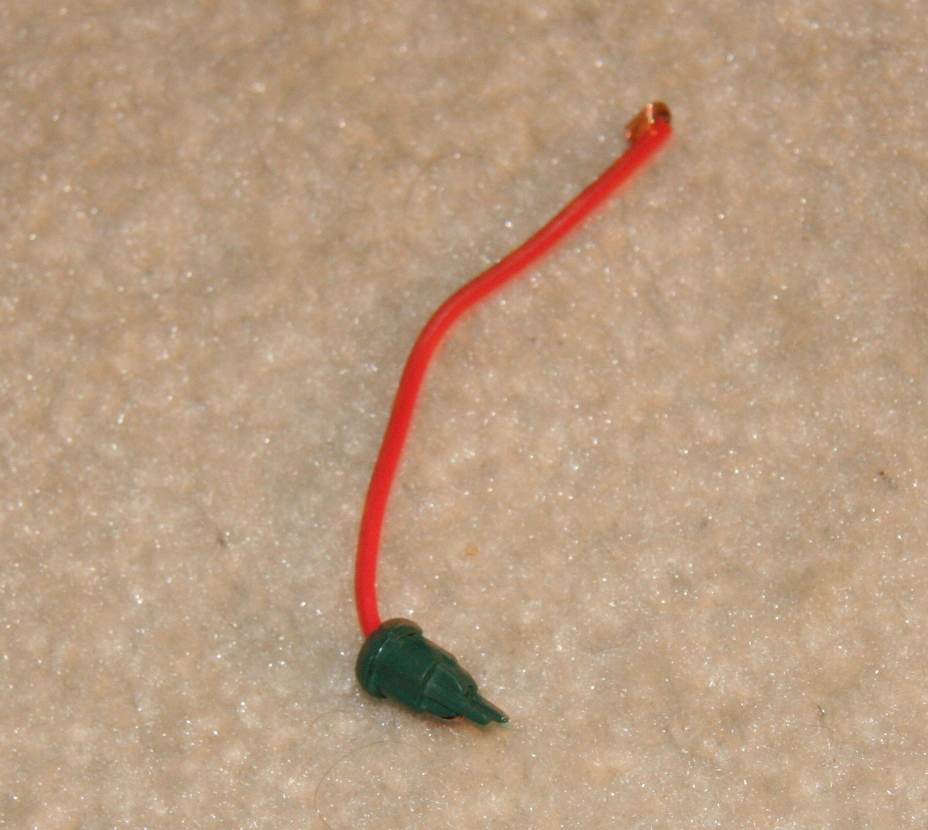
The first step in the repair was to confirm that the bulb was bad. First,
I built a "test bulb" by taking a bulb out of its base and replacing it with a
wire that only contacts one side. This allowed me to get reliable contact with
the electrical contact in the socket while breaking the contact from one
side of the socket to the other.
Next, I measured the resistance from the plug through the working half of
the set using an ohmmeter. I then repeated across the non-working half of the
set all the way up to the socket before the so-called "current limiting" bulb.
The resistance was about the same, so clearly there were no electrical breaks
or failed bulbs causing the problem. This pretty squarely placed the blame on
the "current limiting" bulb.
The next step was to determine what this so-called "current limiting" bulb
really was. To do this, I measured the resistance across a single standard
bulb and the resistance across the working current-limiting bulb on the first
half of the string. Hmm. About the same, or a least within the +/- 15%
tolerances typical of cheaply-made electronics. So basically, it appears to
be just a glorified fuse. In other words, "current limiting" is a misnomer,
unlike other types of hardware (e.g. LEDs) where a device actually does limit
the flow of current....
Now came the hard part. The bulb is not designed to come out. Its base is
recessed into the socket so that you can't grab it usefully. I tried pulling
on the bulb, but it just pulled right out of the base. Hmm. Time for some
excessive force. Using a screwdriver, I was able to peel away enough of the
white plastic insert to get a good grip on it with pliers. That piece broke
off, naturally. After about three attempts, I managed to grab a solid enough
piece of the white plastic insert to yank the thing out of there.
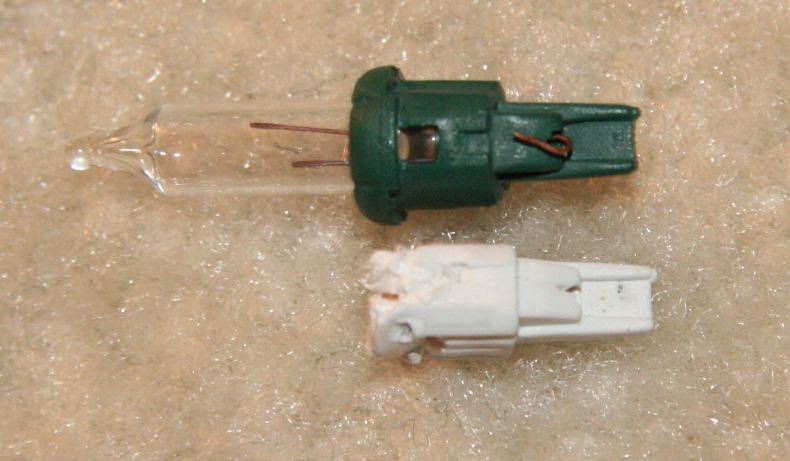
Once inside, I found that the socket was basically a normal socket, albeit
stretched slightly. With a squeeze of my pliers to correct for the distortion
caused by my screwdriver, I was able to get it to make constant contact without
a bulb in the socket. At that point, the set lit. In the photo below, the
"current limiting" bulb is at the middle at the bottom. The other socket is
a standard socket, shown here for comparison.
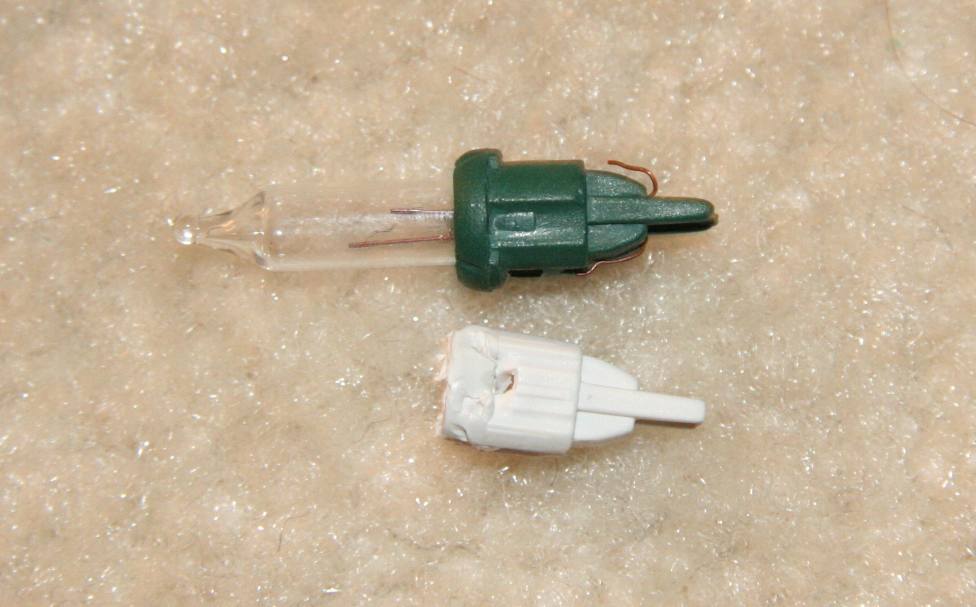
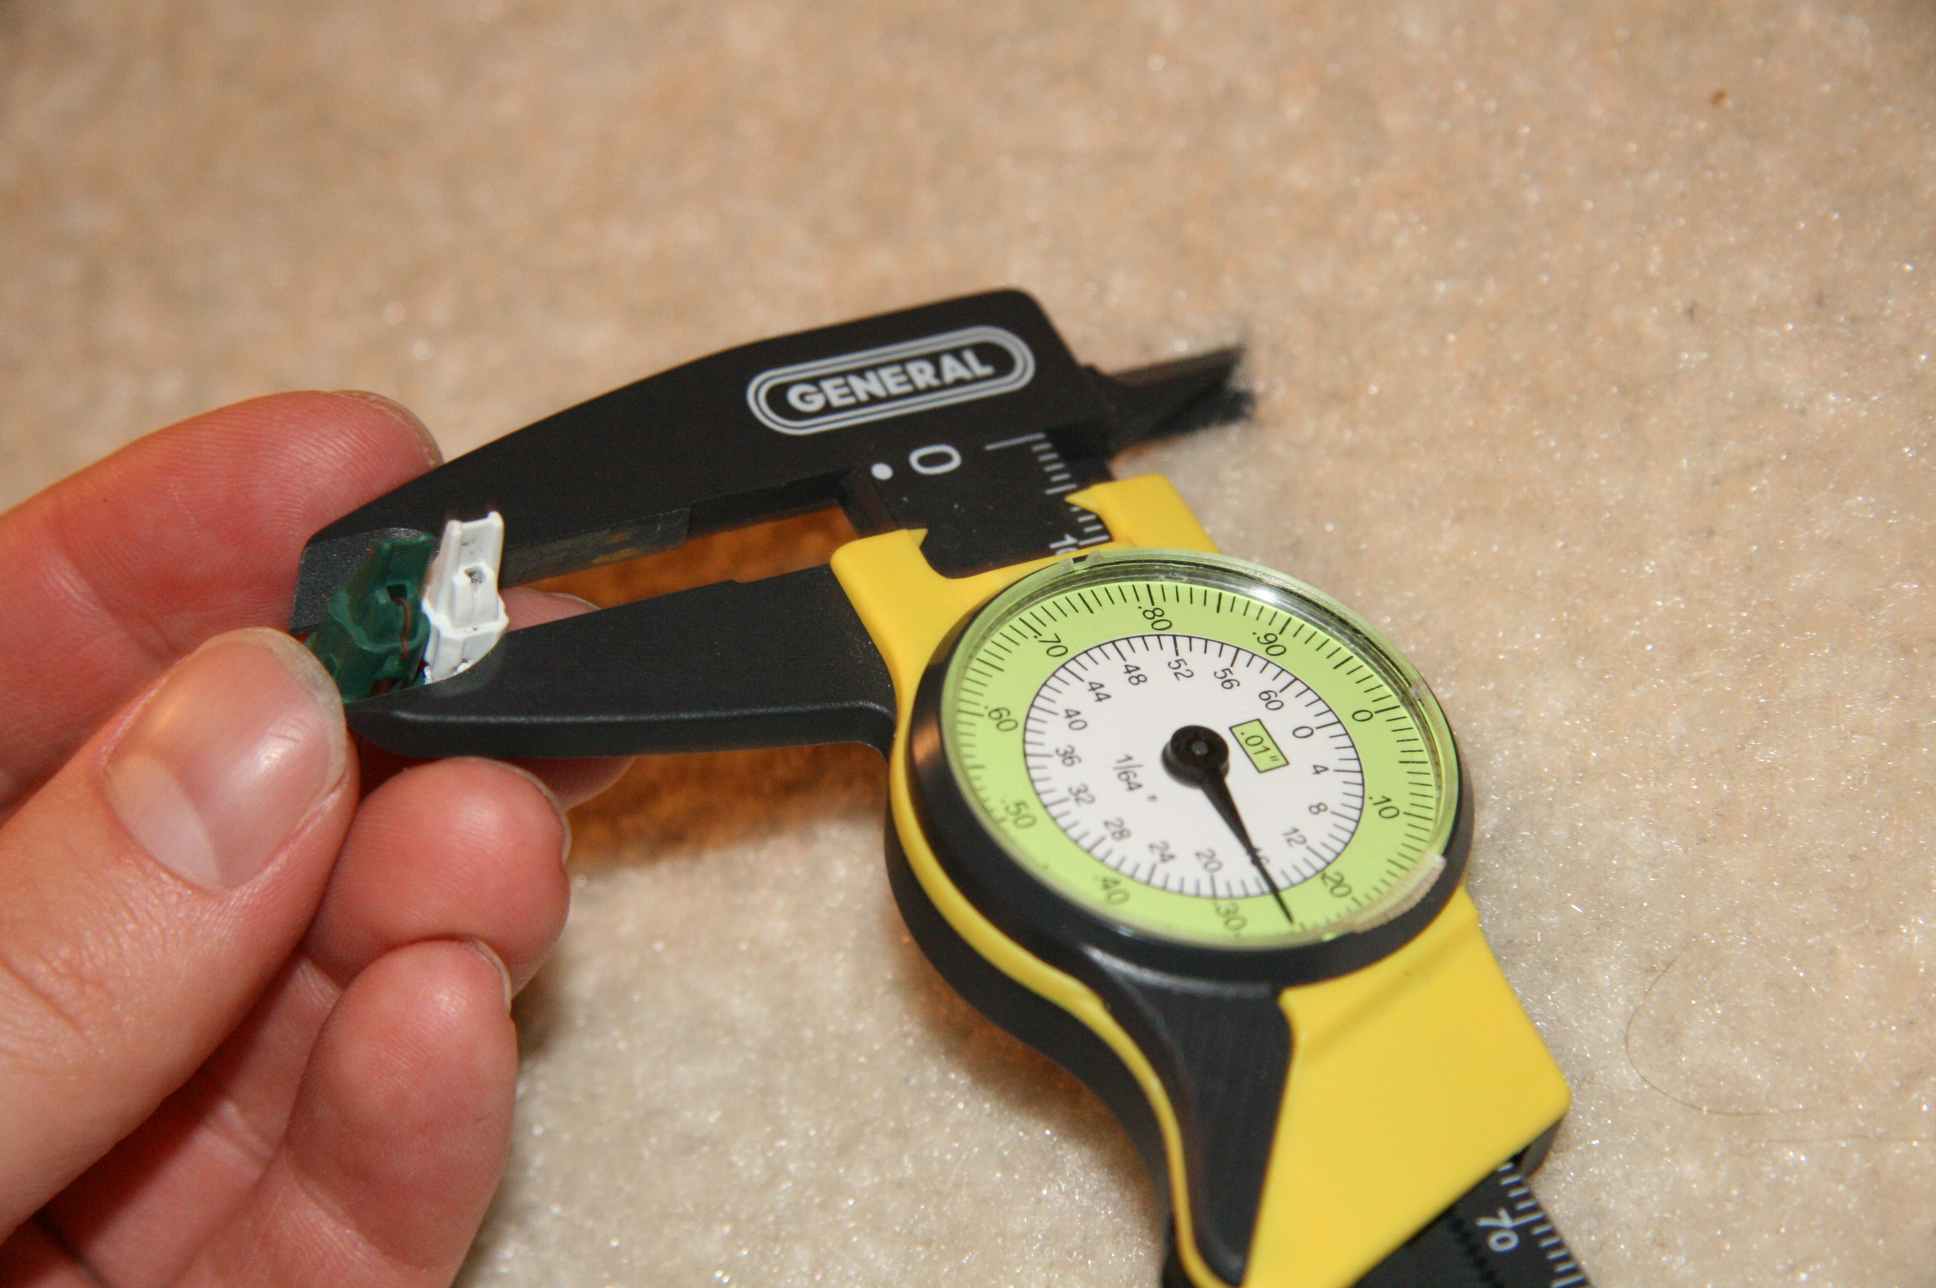
Unfortunately, upon trying to put a bulb in that socket... well, it isn't
quite a normal socket. The final repair step was altering a bulb base
and the socket so that I could put a normal bulb in there. This was a two-part
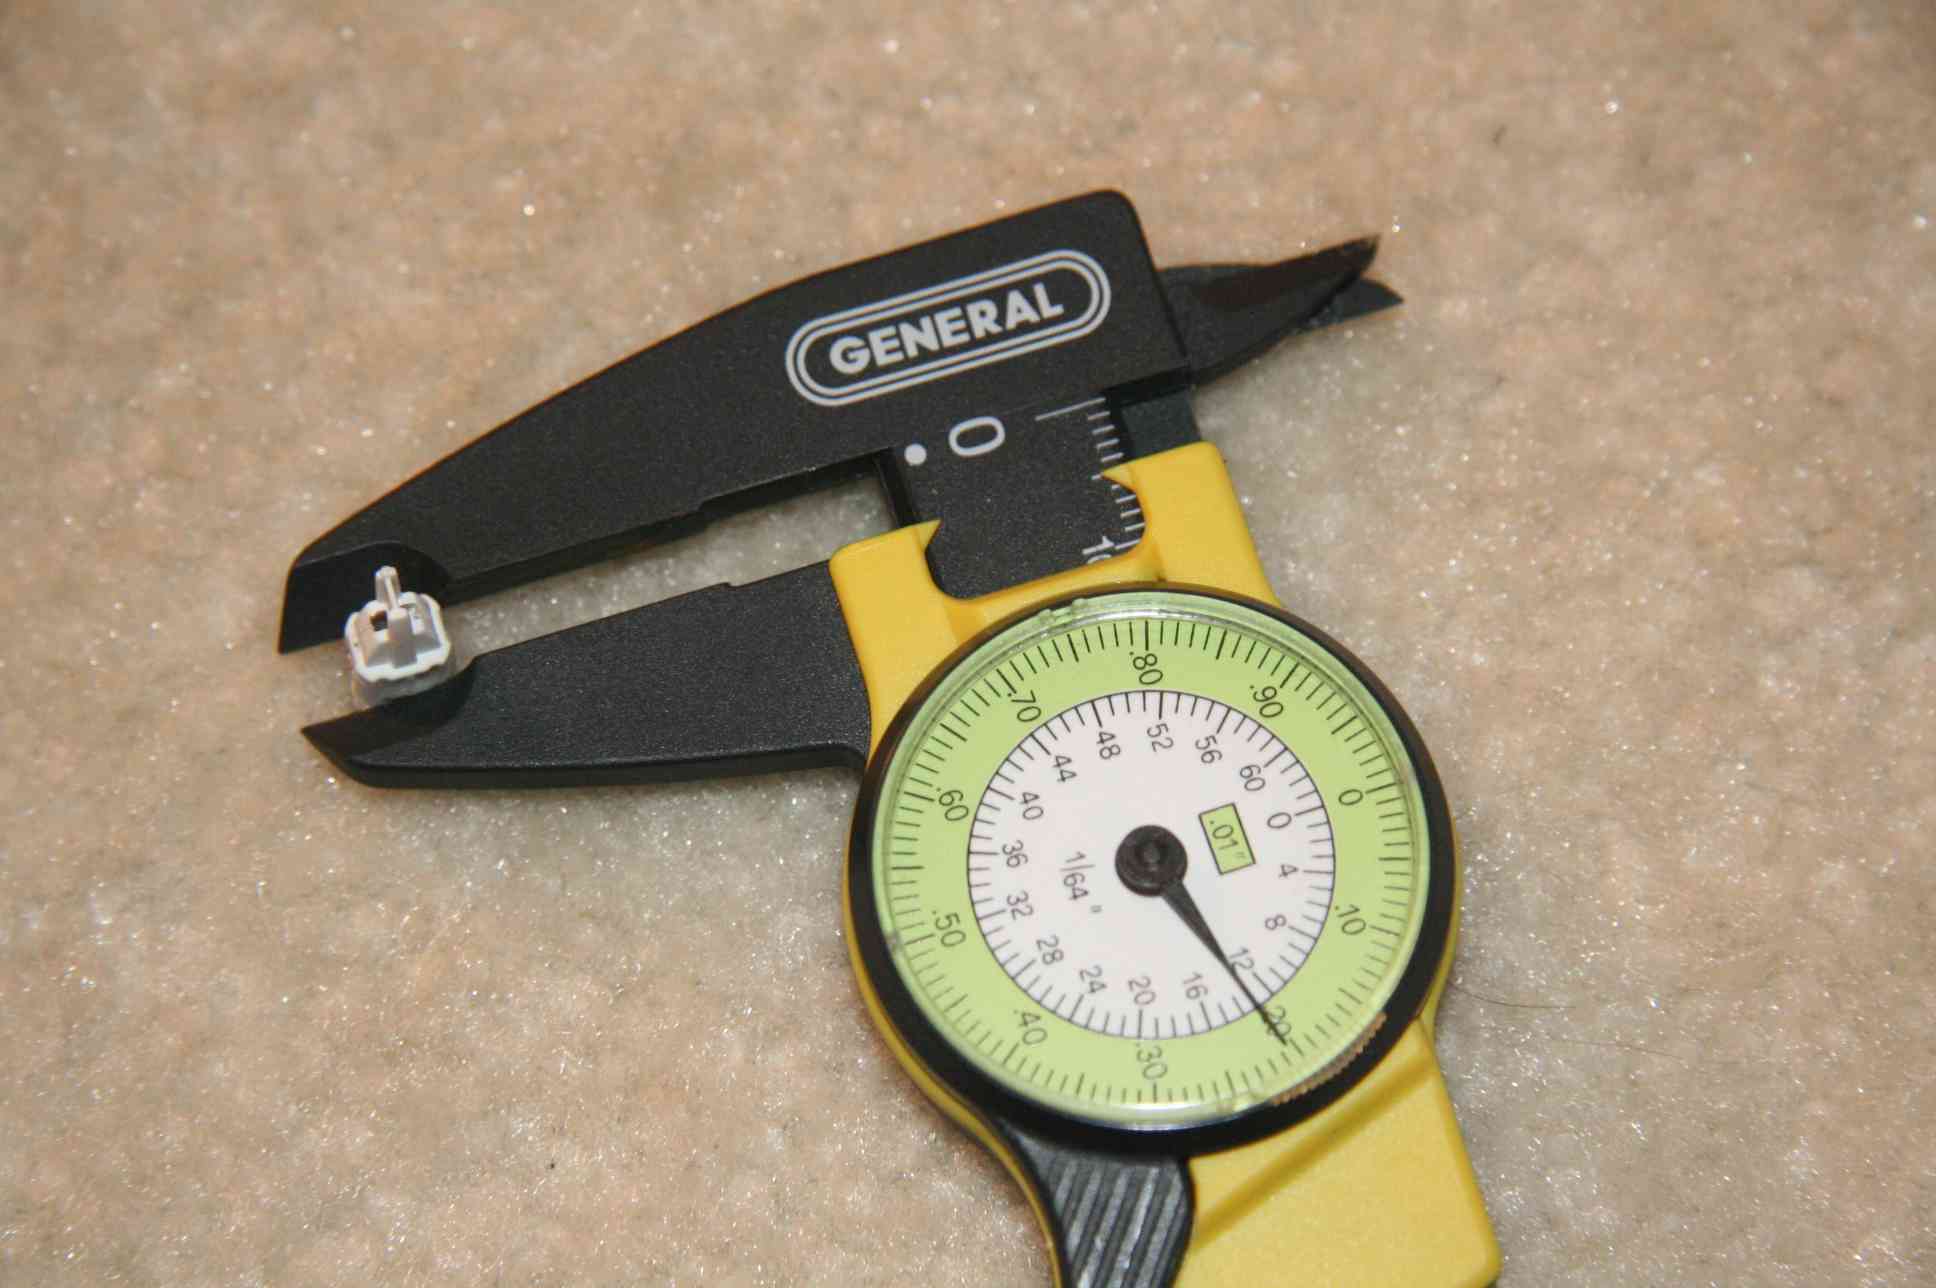
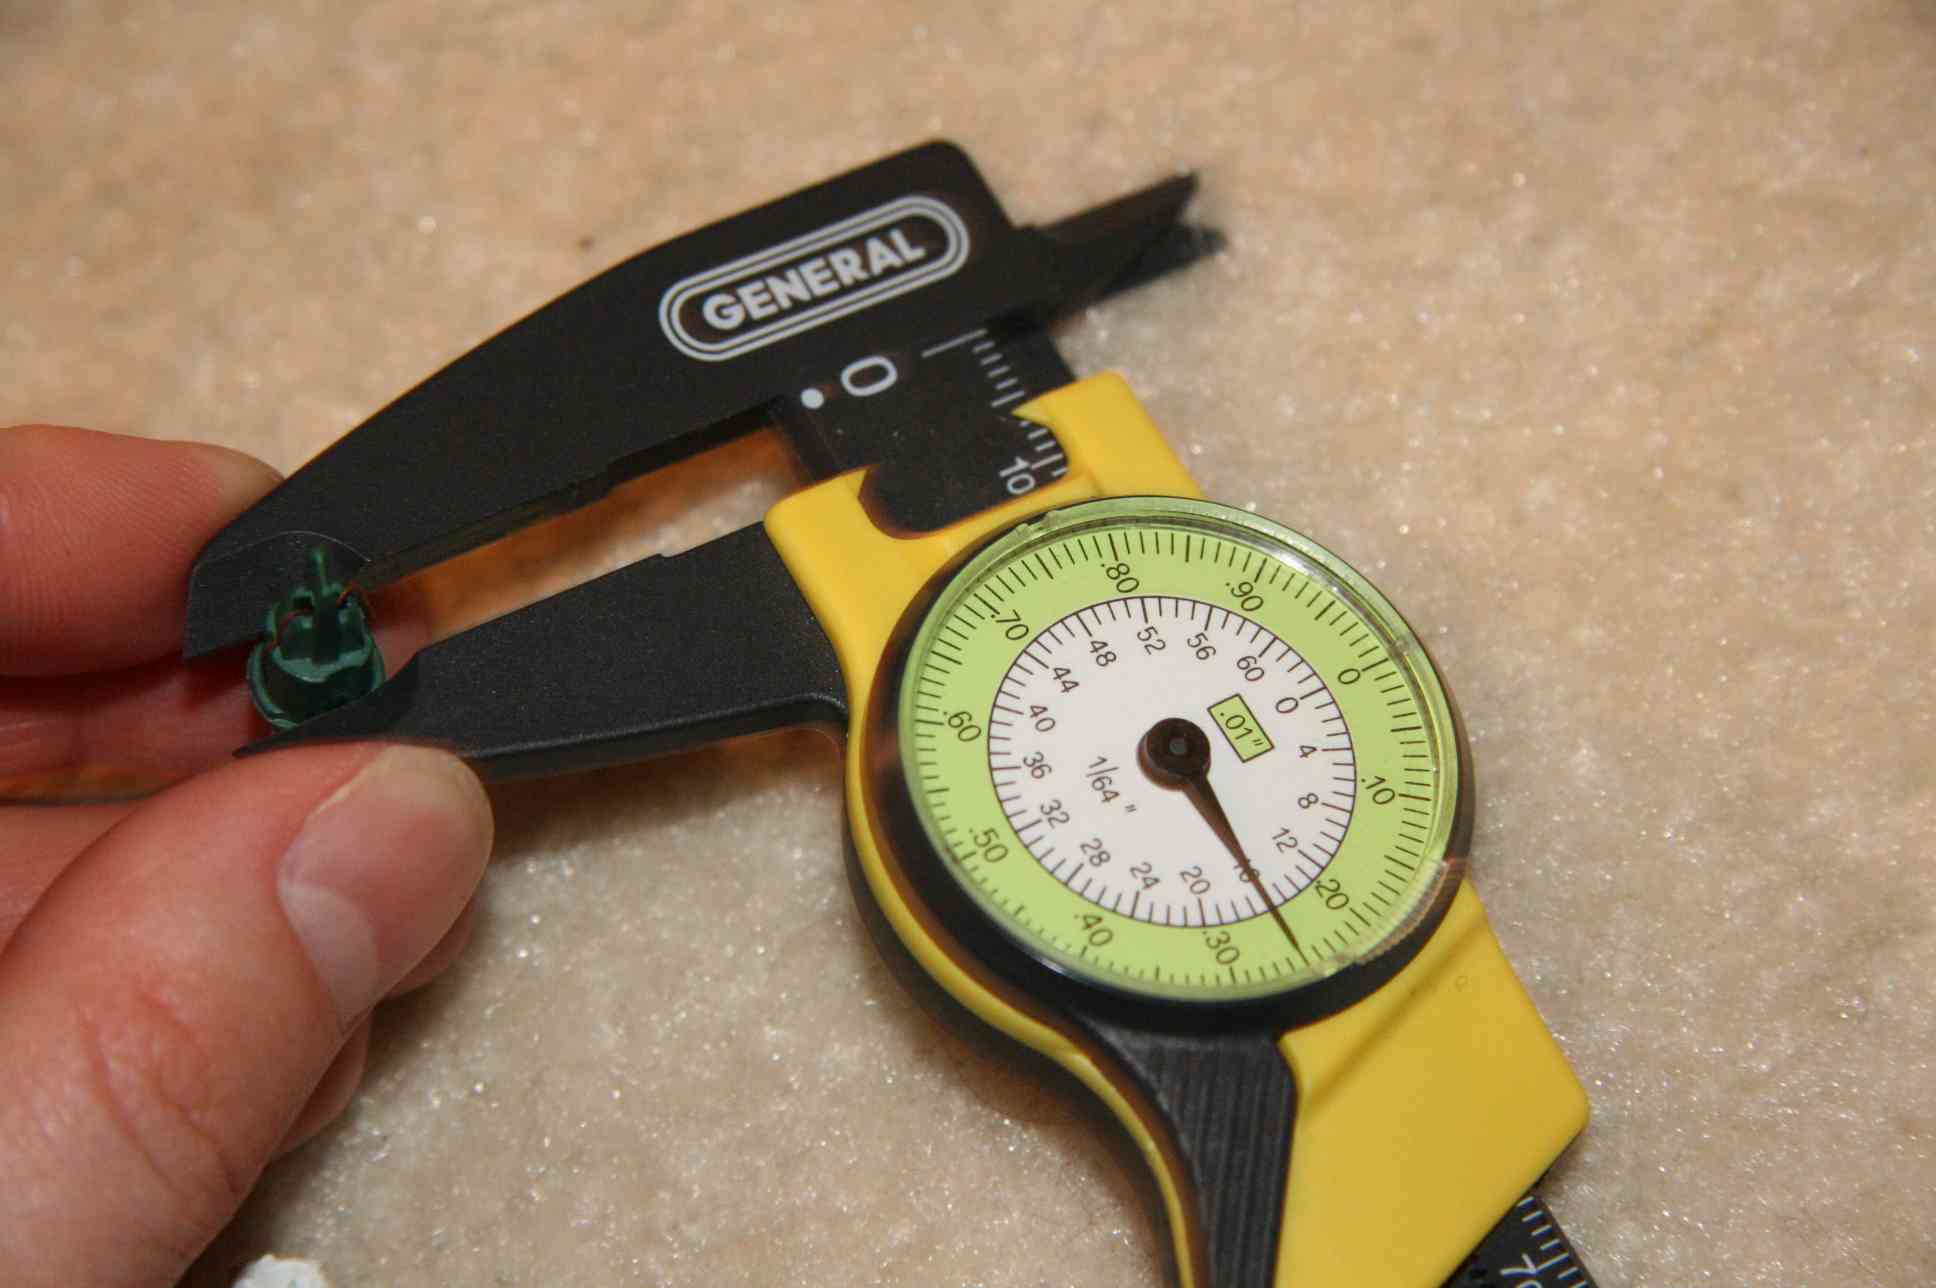
process. The first step was altering the base. In one direction (as shown
in the photos below), the base is the same size (or at least close enough).
In the other direction, a standard base was about 0.045 inches too large.
Reducing the base size required some coarse grit sandpaper and about ten
minutes of sanding.
In addition to filing down the side, I also had to file down a little bit of the thickness of the rim on the other two sides because the bulb would only
go down far enough to break the contacts inside the socket (with some pressure)
and not far enough to make contact with the bulb.
Finally, I reduced the height of the socket by sanding the end of it with
coarse grit sandpaper. This gave the modified base the extra fraction of a
millimeter it needed for the bulb's contacts to connect electrically with the
socket.
All in all, I spent more than two hours tracking this down. Unless you are
faced with the hassle of a dead branch on a pre-lit tree, this probably
isn't worth the effort. That said, it was a mildly entertaining project
that might be helpful for others faced with the same problem.
In my opinion, this product really diminishes the GE brand. It definitely
does not live up to their usual standards. If I were in GE's position, I
would significantly change several aspects of the design of this set.
First, the base should not have a center prong that extends so far past
the contacts. This is the reason why the set has a blackout period when
the bulbs are only partially inserted, making the "Constant on" feature
pretty much useless in the real world, where a bulb is far more likely
to be loose than missing.
Second, the "current limiting" bulb is absurd. You already have a fuse
on the freaking cord. There's no reason to add a second protective device
at all, much less one that cannot be replaced by the end user.
In hindsight, I realize that the socket for the "current limiting" bulb
was probably distorted to begin with. Had GE made it so this bulb could
be easily removed, I could probably have fixed this whole problem by
squeezing the socket with pliers until the set came on. Unfortunately,
because the barbed base of the "current limiting" bulb was specifically
designed to be non-removable, it was not possible to determine the cause
(or even to determine that it resembles a standard socket down inside)
without basically destroying the "current limiting" bulb's base.
GE should be ashamed of themselves for putting out a product with such
fundamental design flaws.
Did you enjoy this article?
You might also like “A Patriots Christmas”, a Christmas short story from my sci-fi/humor book series, Patriots, available from Amazon,
the iBooks Store, and other retailers worldwide.
Copyright 2008 by David A. Gatwood.
Permission to reprint for
noncommercial purposes is hereby granted. All other uses require prior
written permission.